Working with DP groups
The following example defines a group for different data points and demonstrates filtering options.
Familiarization with the details of different data point group filtering options.
Preparations:
-
In order to try out the different filtering options, sample data point types were used for the following examples: Motors and Valves of DPTs PUMP1 and SLIDE_VALVE1.
-
For each data point type data points were created, three data points for a plant with 3 halls (A, B, C), three data points each for the motor data point type, for example, 1A_M_motor1 (that is, motors 1-3 for plant 1, hall A) and so on up to a total of 9 data points.
Also data points 1A_V_valve1 and so on were created for the Valve data point type (also 9 data points).
Assuming that you wanted to display specific data points such as all motors in plant 1, hall A or all valves of the plant, you could do this as follows:
 How to create a new group
-
Open the DP-group administration panel.
-
Click New and enter a specific group name, for example, Motor_1A with the option "Private";. This specifies that this group can only be used if you enter your user name. If you want to make the group available to everyone, select "Public".
-
Create the Motor_1B and Motor_1C groups in the same way.
Note:If the language name is empty, the current language is applied and if this is also empty, the first language whose name is not empty is applied.
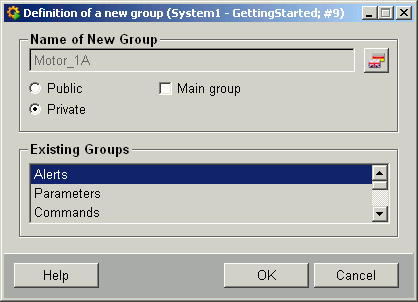
-
Click OK.
-
The combo box now contains the new group.
You can now configure this new group using different filtering options in such a way that only all motors of plant 1 and hall 1 are shown.
See Working with the new DP selector for details on how to filter and select data point elements using the DP selector (+DP button).
 How to define a data
point element filter
-
Click the +DP(T)-Filterbutton.
-
Select the PUMP1 data point type.
-
Enter 1A*, 1B* or 1C* as filter (what filter should be chosen depends on the group item selected earlier). In the figure below, the defined filter is 1A*.
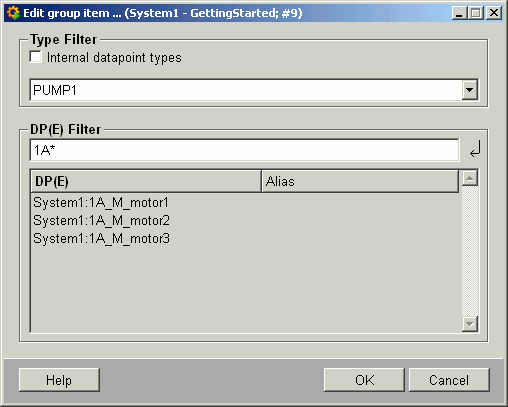 Note:
Note:Note that if you have defined an alias filter (see chapter filter by alias names), an alias name is shown in the "Alias" column.
-
Click OK.
Your data point group definition panel now contains a table entry PUMP1 under Data point Type/Dp-group and 1A* under DP(E) filter.
You could also query all valves in the same way.
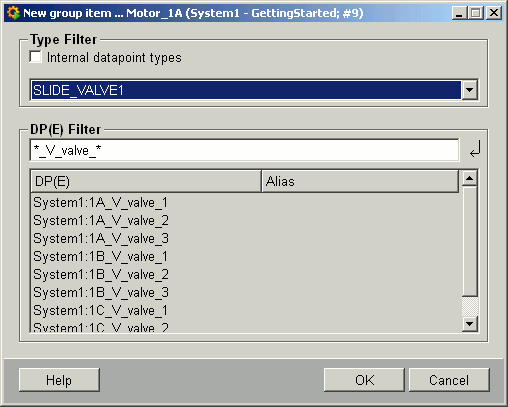
Click the "Check..." button. The list of items must contain the 9 data points of the Valve data point type for all halls in plant 1.
 How to define a group filter
You can also assign groups within groups: To do so proceed as follows: Create, for example, a group called Motors_Plant1 as a main group via the New... button (see how to create a new group) and assign the groups Motor_1A, Motor_1B and Motor_1C to it.
-
Select the Motors_Plant1 group.
-
Click the +Groupbutton.
-
Select Motor_1A.
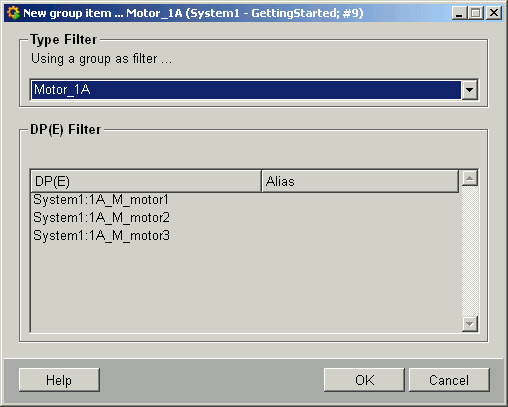
-
The "Motor_1A" group is added to the list of filters and indicated as a group by the letter "G" in the last column. Add Motors_1B and Motors_1C to the group.

When using the DP selector to select items, you can specify this filter as a filter for "Group in Group" (see DP selector).
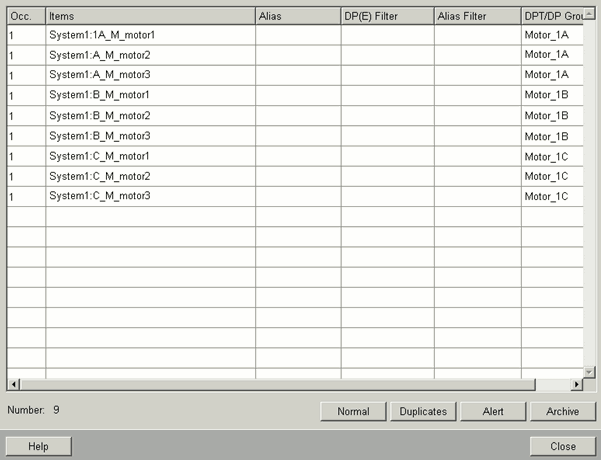
Click the "Check" button. The list must now contain 9 items: the motors in plant 1 (3 halls) see also the figure Check group further on. Note that some filter settings count data points twice. In order to prevent this, check the group settings as follows:
 How to check your group
settings
-
Click "Check".
-
The Check Group panel opens.
-
The list contains all items corresponding to the filter settings.
-
Click "Duplicates".
-
This display shows how often the items occur in the first column.
-
If a data point occurs several times, you should modify your filters.
Figure: Check Group ... Motors_Plant1
Note that filters are OR-linked. This means that if multiple conditions are met, the results of all filters are displayed.


