Retrieve information from ONVIF cameras
|
This chapter shows how necessary information for configuring ONVIF cameras can be retrieved. The required parameters must be read from the camera. Therefore several tools can be used. In this chapter the open source tool "ONVIF Device Manager" is used as example. Retrieve informationen with the ONVIF Device Manager Step 1: ONVIF Device ManagerAfter installing and starting the ONVIF Device Manager the connected camera is automatically found. If the camera is not displayed try clicking on "Refresh". If the camera is still not displayed it may not be a proper ONVIF camera or this service is disabled in the camera configuration. Select the required camera from the Device List. The URI is shown when clicking on menu point "Identification".
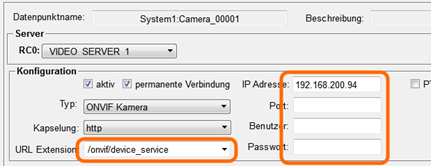
Create a new IP camera via the WinCC OA Video Object Explorer and select the type "ONVIF". Enter the host part of the URI into the IP address field and if it exists the port and optionally user name and password. Additionally the path given in the URI must be inserted into the URL extension field.
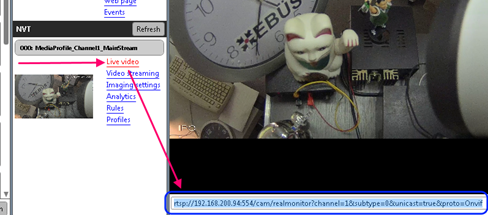
The streams available for this camera are listed under "NVT" in the ONVIF Device Manager. Depending on the camera configuration it may be necessary to log in with properly user credentials at the top of the window. Clicking on menu point "Live video" of the required stream opens the appropriate video. The stream URL is displayed beneath the displayed video.
Enable the required streams in the configuration panel of the camera. Enter the appropriate parts of the stream URL into the appropriate fields of the configuration panel.
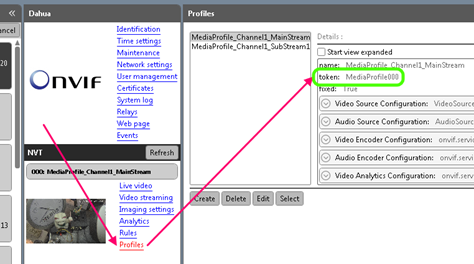
If the camera supports PTZ control the MediaProfile parameter must be defined in WinCC OA. Click on "Profiles" menu point of the required stream and insert the value from the "token" entry into the MediaProfile field.
|