Video Widget Configuration
Note: The video functionality and the Dashboard must be added to the same project.
- Install the WinCC OA with Video-Add-On .
- The video widget must be added to the Dashboard.
- Before using the widget, configure the cameras - see chapter Creating cameras.
- Add a Control and a Video manager to your WinCC OA Dashboard project- see chapter ../../grundlagen/Video_grundlagen-01.html#Video_grundlagen-01__integrate_video.
- Add the host name of your computer via the . See chapter System configuration.
- Open the video widget - see also Dashboard. In order to open the video widget in the Dashboard, add the video widget to the Dashboard as follows:
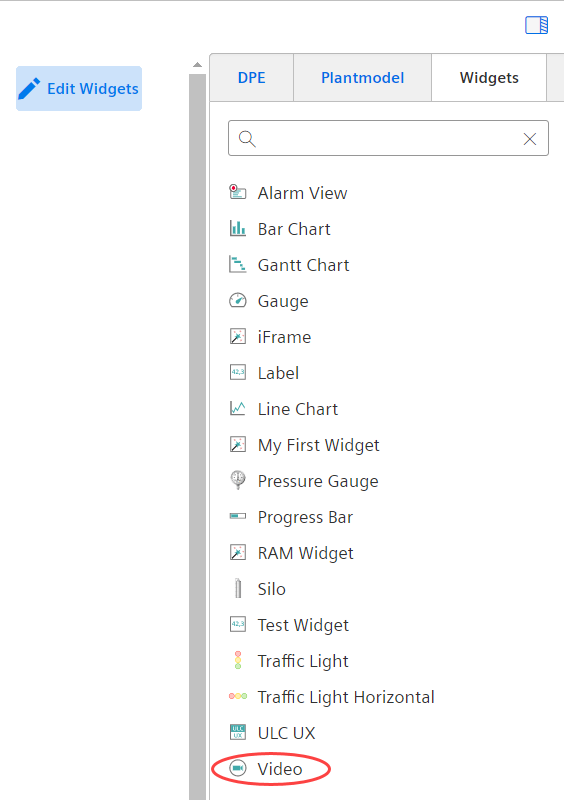
- Click on the Video Widget:
Figure 1. Dashboard - Video Widget 
- Select the Video Widget :
Figure 2. Widgets - Video Widget 
- Open the Dashboard - see chapter Dashboard Overview, and the video widget:
Video Mode
-
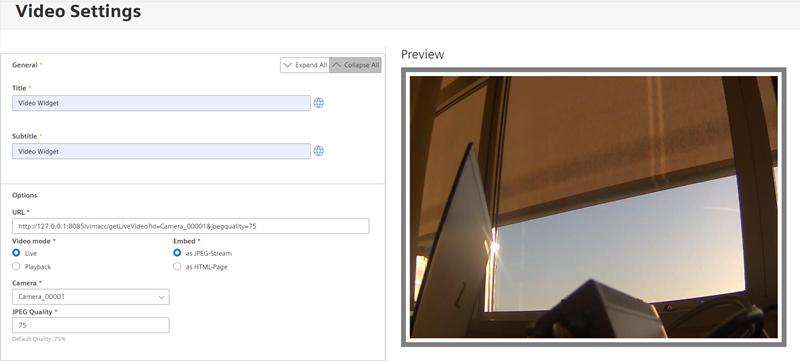
Figure 3. Video Settings - Video Mode "Live" as JPEG Stream 
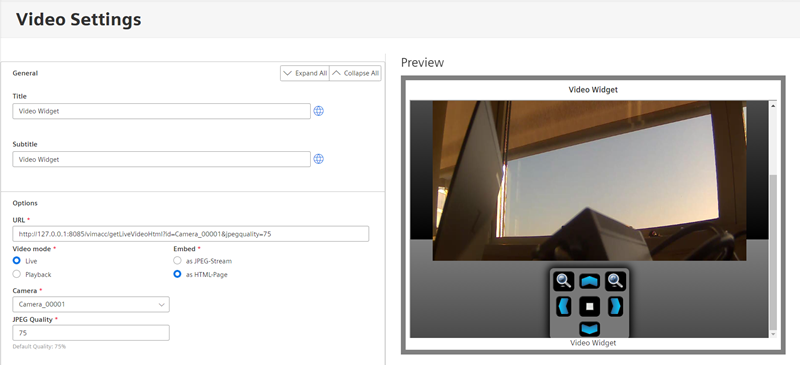
Figure 4. Video settings - Video Mode "Live" as an HTML Page 
Figure 5. Video Settings - Video Mode "Playback" 
Video Settings Description Title Specify a title for a video. You can set different languages if your project is multilingual. Use the globe symbol to select the language. By default the selected project language is shown. Subtitle Specify subtitles for a video. You can set different languages if your project is multilingual. Use the globe symbol to select the language. By default the selected project language is shown. URL The URL consists of an IP address, the port number (by default 8085), a camera name and the camera quality. You can edit the URL directly by, for example, entering the camera number or the JPEG quality. Video mode You can select either the Live mode or the Playback mode. In the playback mode you cannot control cameras. Therefore, the camera option is not required. Embed Embed the video widget as a JPEG stream or as an HTML page. In JPEG format the entire image contains the video and there is no control area.
The cameras can be controlled in HTML format. Note that it depends on the camera type whether the cameras can be controlled.
Camera Select a camera from the dropdown menu. JPEG Quality Specify the JPEG Quality: between 1 and 100.


