A WinCC OA installation installs the different components of WinCC OA such as database, UI runtime and other features based on the
selected installation components.
Download the WinCC OA installation package from the WinCC OA Portal or copy the already downloaded
installation package into a locally accessible directory.
Within the Windows Explorer navigate to the directory in which the WinCC OA installation package is located.
Double-click on the WinCC_OA_3.18_windows_x64.exe to start the installation, see
installation process
Important:
Administrative rights are necessary for
the installation of WinCC OA!
If you start the WinCC OA installation through WinCC_OA_3.18_windows_x64.exe, the installation language depends on the language that
was set via the control panel. First the "User locale" language is used if it was
configured. You can set the "User locale" via Control Panel > Region and Language > Formats tab > Format.
If the "User locale" language was not set, the "System locale" language is used. Set
the "System locale" via Control Panel > Region and Language > Administrative tab Click the Change system locale... button. This
means that if a language was set for a user, this language is used. If a user
language was not set, the system language is used.
If neither "User" nor "System" language was specified, English is used. If you
install an update, the language of the original version installation is used by
default. The WinCC_OA_3.18_windows_x64.exe can also be called by using a language option
directly.
You can call the setup by using a language option directly.
Setup call in English:
WinCC_OA_3.18_windows_x64.exe /lang en
Restriction:
Note that if the installation was executed in one language,
e.g.: in German, you have to uninstall WinCC OA to execute the
installation in another language, e.g.: English.
Important:
If the error "Error 1324. The path
Datenpunkttypen_f?_Symbolkatalog contains an invalid character." occurs
during the installation of WinCC OA, the settings for programs
that do not support Unicode must be changed. Under Control Panel > Regional and Language Options > Advanced the option Select a language to match the language version
of the non-Unicode programs you want to use must be set to either
German or English.
Related Installation Version
If a related WinCC OA installation is found, an error message is
shown.
Installation Process
The WinCC OA setup process is performed by using a Wizard. The
setup program displays the version number during the installation. To install the
WinCC OA components (features) complete the following
steps:
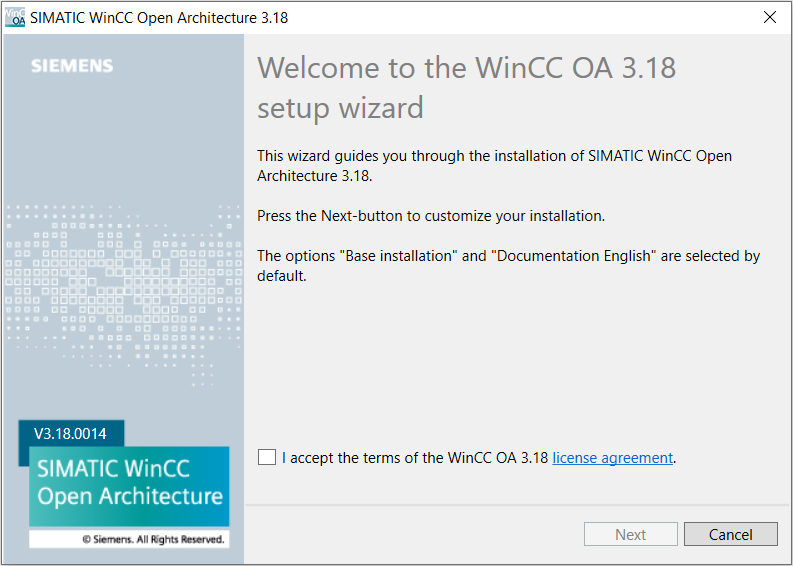
EULA - accept the terms in the End User License Agreement and continue by
clicking "Next"
Figure 1. Install wizard - Welcome and EULA
.
Select the installation options that should be installed.
Figure 2. WinCC OA Install wizard - Setup Options
By default the base installation and the Documentation are
preselected. The base installation is required for the use of WinCC OA. Most features are installed together with the
base installation (see the feature
list further below). To install other features, select the
features you want to install. The following features can be selected, the
S7PlusDriver, Video-AddOn, Example projects, API and, OldVersion Support. Once
a standard installation exists, individual features can also be installed
later. Note that for most of the features a unique license is required (see
Licensing).
Select an installation directory as well as a project directory for the WinCC OADemoApplication
and GettingStarted projects (applications). By default WinCC OA is installed in the C:\Siemens\Automation\WinCC_OA\3.18\
directory. The projects are installed under C:\WinCC_OA_Proj\ by
default.
Restriction:
Note that the installation path must not contain any
spaces.
Restriction:
WinCC OA cannot be installed on a
network drive.
Click on "Next" to continue.
Ready to Install the Program - click on "Install" to install WinCC OA with the selected components.
You can launch WinCC OA immediately after installation. As
a rule, it is not necessary to modify environment variables.
Use the WinCC OA functions intended for backup in order to
backup the WinCC OA data (online backup, backup of the
alert archives, backup of the HDB directories). For details, see the chapter
Database.
Base Installation
The Base setup contains the runtime and engineering components.:
Server (Development & Runtime)
UI Runtime (client only) - minimum option. Requires access to a WinCC OA server system.
Advanced Maintenance Suite - tool for efficient planning, management, execution
and control of maintenance and disturbance.
BACnet - BACnet building automation package
(driver, object library library and HMI)
Disaster Recovery
System - addOn for coupling / data synchronization of two hot-standby
systems, to create a double redundant warm-standby system
DBLogger - Database connection
to relational databases via ADO.
OleDB Provider Client only - installs all essential files for accessing
historical WinCC OA data via OLE DB. Requires
access to a WinCC OA server server system.
Recipes - Recipe management system
for configurable recipe types and unlimited number of recipes. Value acquisition
from current process values, Excel (CSV) import / export.
Report
(Excel) - WinCC OA Reporting system for Microsoft
for Microsoft Excel. Microsoft Excel program files are not included.
Standard Object Library - Base framework for branch specific WinCC OA object libraries.
Video Add-on
Video-Components for integration and management of video IP devices. For more
information on the Video components, see the chapter Video Basics.
Video Explorer - Object explorer for easy configuration and management of
video devices.
Video Server - 3rd party component for the installation of a video
management server (WinCC OA installation not required).
Display Server - Optional 3rd party-component to display video streams on
a computer (WinCC OA installation not required).
Example Projects
Demo Application - sample application 'DemoApplication' introducing the possibilities of WinCC OA. Bilingual graphical user interface and database
(English/German).
The name of the demo application project contains the version number, for
example, the demo project of version 3.18 is called
"DemoApplication_3.18". Therefore, it is possible to
execute the setup program of more than one versions and to have one demo
project of each version.
GettingStarted-Application - sample application 'GettingStarted'
for building a WinCC OA project step by step. Bilingual
graphical user interface and database (English/German).
The projects are installed in the directory
C:\wincc_oa\by default.
API AddOn
WinCC OA application programming interface (API). The environment variable API_ROOT
is mapped to the directory where the API is installed. The default installation
directory is C:\Siemens\Automation\WinCC_OA\3.18\api.
Old Version Support
This contains the old version database definition files and binaries. These are
required to update old WinCC OA projects to the current
version.
Documentation
WinCC OA Online Help is available in English, German or Russian.
Select the desired language(s).
Update Installation\Uninstall
If a WinCC OA version is already installed and you try to install
a version, a window for upgrade is opened "Upgrade your installation of WinCC OA3.18"
You can also modify, repair or remove the version via the Control panel > All Control Panel Items > Programs and Features:
Select the option Change , either via right-click-menu on the
WinCC OA3.18 symbol or marking the symbol with a left-click and selecting
Change in the menu options above.
You can select the following options in the WinCC OA dialog:
Repair - Repairs the installed program, for example,
corrupt files, registry entries. This option is an MSI feature.
Modify - allows you to install additional features or to
uninstall already installed features. Features that are already installed are
preselected. If you deselect a preselected feature, it is uninstalled.
Remove - Removes WinCC OA from your
computer (see also Uninstall).
Troubleshooting:
Under certain circumstances, the MSI
uninstall routine might not remove WinCC OA correctly from
the system. Since a newer installation is already installed, former versions
cannot be installed. In this case use the Windows Installer CleanUp Utility to remove the old
installation.