Settings Tab

On the Settings tab you can configure the settings for the backup. The tab consists of three sections:

  • Device
  • Automatic DB Backup
  • Cancel DB Backup

To apply the settings, click the apply button at the bottom of the panel. You can also just close the panel without saving the settings.
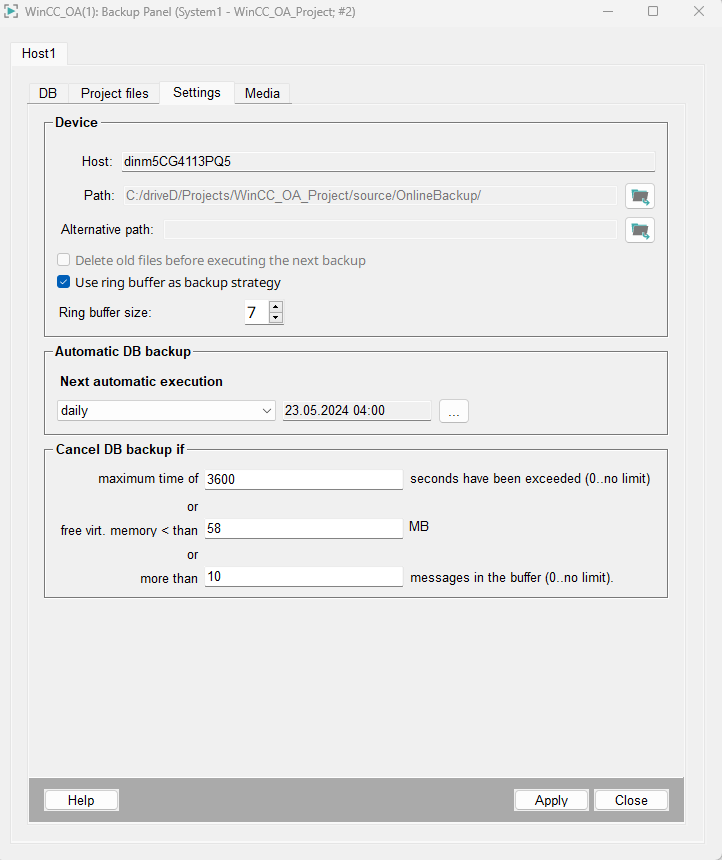
Figure 1. SQLite® Online Backup - Settings Tab
Figure 2. RAIMA Online Backup - Settings Tab

Device

Figure 3. Device Section
In the Device section the host name is shown and you can select the path for the backup directory.
CAUTION: The default path for the Online Backup is in the WinCC_OA_Proj/source/OnlineBackup. Note, however, that the location should not be in the WinCC_OA_Proj for security reasons. If you select another directory from the project path, an error message is shown.

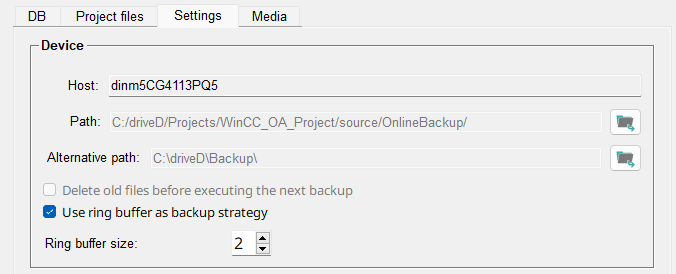
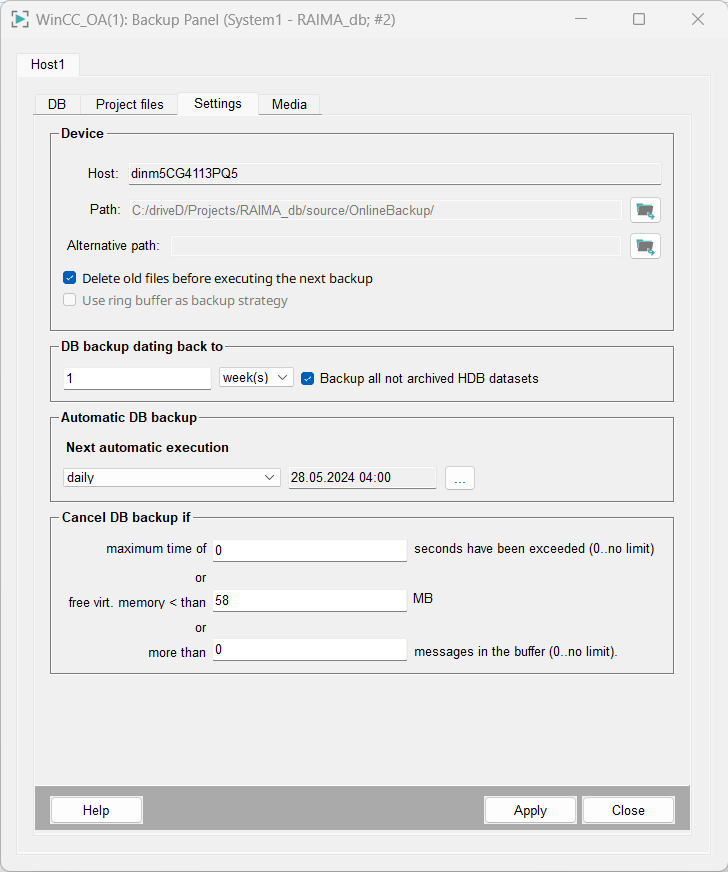
You can either select to delete old files before executing the next backup or use ring puffer as backup strategy.

For example, if you select use ring puffer as backup strategy and 5 for the Ring buffer size, backups are created until there are 5 backups.

When the next backup is created and the ring buffer is full, i.e. there are already 5 backups, the oldest backup is deleted to make room for the new backup.

The ring puffer size specifies how many old backups are saved. You can save up to 10 backups.

The alternative path can be optionally configured to save a backup in this path if it cannot be saved in the specified path.
Note: The alternative path and Ring buffer size can only be used for the database backup.

DB backup dating back to

Figure 4. DB backup dating back to
DB-backup range back to: Here you define which period your online backup should cover. You should set the DB-backup range back to field to an appropriate interval. "Appropriate" means an interval that corresponds to the interval at which you copy your important data to external storage, as specified in System Management Panel > Database tab > Online backup > Configuration.
Note: If you exceed the limit for a selected time range, then the time range is automatically increased. Example: for days: 1,2,3,4,5,6,7 are OK. 7 changes to 1 week. 8,9,10,11,12,13 days are 1 week; 14 days change to 2 weeks and so on.

Backup all not archived HDB datasets: Select this option to include all archive files that were not archived to the online backup yet. Note that this option is independent of any set backup period.

Automatic DB Backup

Figure 5. Automatic DB Backup
Specify when the next automatic database backup will be executed. You can select between following options:
Figure 6. Next automatic execution
  • never
  • daily
  • weekly
  • monthly
  • every year
You must also select the time when the backup is executed. Click on the button with the three dots ... to open the following panel:
Figure 7. Select the backup time

Cancel DB Backup if

Figure 8. Cancel DB backup if

You can cancel the database backup if the maximum number of seconds specified has been exceeded. If you specify 0, there is no limit. You can also specify the number of MBs the free virtual memory must not exceed, otherwise the backup will be canceled. Alternatively, you can cancel the backup if there are more than specified number of messages in the buffer. 0 means that there is no limit to the number of messages.