Standard Project
Server-side authentication for UI Managers provides increased security by preventing access by unauthorised UI clients. Server-side authentication for UI managers only authenticates the UI manager.
Server-side authentication for managers is used for all managers. Session binding reduces the risk of manipulated messages and unauthorised access to a system.
Communication security is increased as access by unauthorised managers is prevented. With session binding, the user name is part of the certificate.
Password Settings
The user root cannot be used to log in, in an SSA (server-side authentication) project. You can, however, use all
other users, for example the user "para". You can find the
predefined users created by default when creating a project in the chapter
"Users". To create new users, see chapter Users. For how to set the
user permissions, read the chapter Groups.
Settings of Server-side Authentication
- The settings of the server-side authentication are shown. Enter the web server host and web server port. You can use the local web server or an already existing web server for the
project. The default port number is 443 under Windows and 8079 under Linux. Then select if you want to create a server-side project for the UI manager or for all managers.
Figure 1. Settings for Certificates - Settings for the server-side authentication 
-
If you selected a project for all managers (recommended), select then the certificates.
The certificates for the web server are automatically copied into the project. The web server certificates are used for all features that require the web server. Such features are, for example, the Desktop UI and ULC UX.
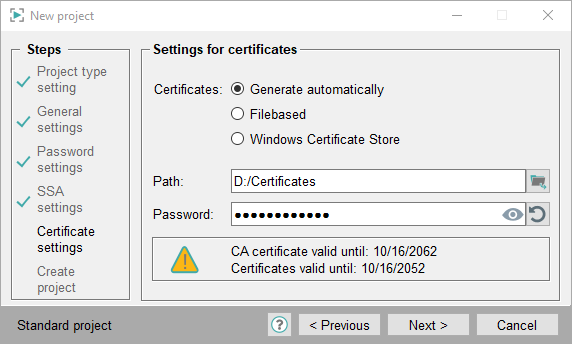
Settings for Certificates - Generate automatically:
Select a path and set a password for the generation of the certificates. The password must be set. The certificates are automatically generated, as the name suggests. Certificates for three WinCC OA Features: MxProxy, Web Server and SSA are created - see figure below.
The certificates are saved in a separate directory called [proj_name_Certificates] in the directory where your project is located. All certificates listed below except for the root private key "root-privkey.pem" are copied to the config directory of the WinCC OA project.


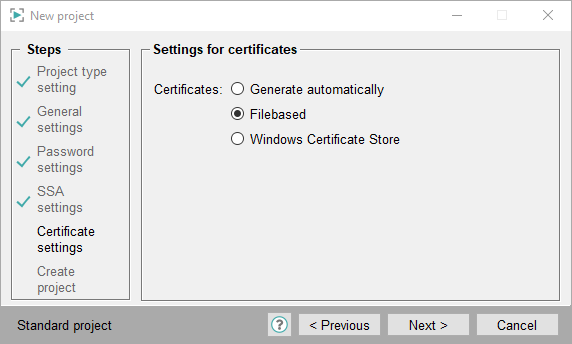
Settings for Certificates - Filebased:
The filebased certificates (.pem) must be created manually. If certificates already exist, you can select them by using the file selector. Select the option Filebased.

- Select certificates or create certificates by using the
 button. It opens the Panel for SSL Host Certificates that can be used to create certificates.
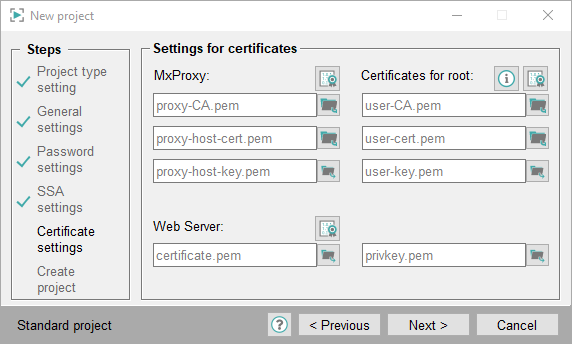
 - Select all necessary certificates (MxProxy, root(SSA) as well as web server - for example for Desktop UI or ULC UX). In the panel SSL Host certificate the right certificate option is always preselected., e.g. Certificates for WCCILproxy for MxProxy.
MxProxy:
The MxProxy certificates are for Multiplexing Proxy.
proxy-CA.pem: CA is the certificate authority. In the SSL Panel the CA is the Root certificate.
proxy-host-cert.pem: The certificate is the Host certificate in the SSL Panel.
proxy-host-key.pem: The private key is the key for the Host certificate. In the SSL Panel the private key is called "Root Key file".
SSA Certificates for root user:
The root certificates are for the server-side authentication of Managers:
user-CA.pem: CA is the certificate authority. In the SSL Panel the CA is the Root certificate.
user-cert.pem: The certificate is the Host certificate in the SSL Panel. Different host certificates can be created for the same root certificate.
user-key.pem: The private key is the key for the Host certificate. In the SSL Panel the private key is called "Root Key file".
You can find an example of the configuration for different users in the chapter Example Configuration - SSA for Managers and an example of the config entries for SSA in the chapter Example of Config Entries - SSA for Managers.
Web Server:
Web server certificates are used for all features that need the Web server. Such features are, for example Desktop UI or ULC UX.
certificate.pem: The certificate is the Host certificate in the SSL Panel.
privkey.pem: The private key is the key for the Host certificate. In the SSL Panel the private key is called "Root Key file".


Settings for Certificates - Windows Certificate Store
In order to use Windows certificate store certificates, the WinCC OA certificates must be converted to a Windows certificate store format (.pfx) and imported to the Windows certificate store. For how to convert and import certificates, see chapter Windows Certificate Store.
-
Select the option Windows Certificate Store and click on Next.
Figure 7. Settings for Certificates - Windows Certificate Store Certificates 
-
Create certificates for the MxProxy and SSA (root) via the SSL panel. Convert the certificates into the Windows Certificate Store format and import them to the Windows Certificate Store - see chapter Windows Certificate Store.
Use Thumbprint of certificate:If many certificates are used, it could happen that two certificates with the same name exist but the content is different in each case. To ensure that certificates are unique, thumbprint certificates should be used. These are always unique.
If you tick the check box Use Thumbprint of certificate, enter the thumbprints of the certificates to the certificate text fields (see the screenshot below). Furthermore, you must use the thumbprints for the config entries in the config file - see chapters Multiplexing Proxy Certificates with Thumbprint and SSA Certificates with Thumbprint.Figure 8. Use Thumbprint of certificate - Thumbprint certificates  CAUTION:
Windows Certificate Store certificates cannot be used for the web server. For the web server, enter the paths of the filebased certificates "certificate.pem" und "privkey.pem" - see figure below.
-
Then enter the certificates in the Windows Certificate Store format:
e.g. MACHINE:MY:SSA_host or MACHINE:MY:SSA_host. If you selected the USER account when importing the certificates, use the USER account, e.g., USER:MY:SSA_host.
CAUTION:For the "Trusted Root Certification" certificate meaning the root certificate that is located in the "Trusted Root Certification" directory in the Windows Certificate Store, use the prefix "ROOT",e.g. MACHINE:ROOT:rootProxy. See also the example below.
Figure 9. Settings for Certificates - Windows Certificate Store Certificates 
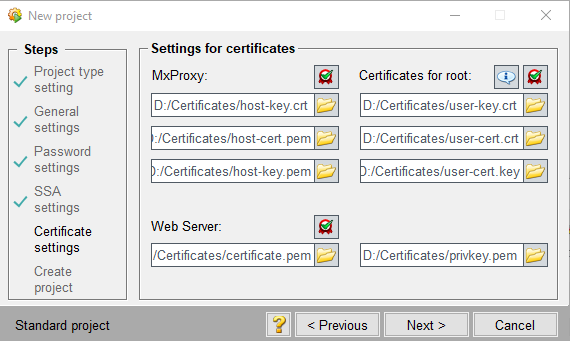
Below you can find a figure that illustrates how to enter the Windows Certificate Store Certificates and how to use them.
Figure 10. Settings for Manager - Windows Certificate Store Certificates - selected Files (Windows Certificate Store -> Settings for Certificates Panel) 


