
Node.js® JavaScript Module Example Implementation
Set up a JavaScript module in Node.js® by using provided templates, updating configuration files, and installing dependencies. Link the module to the JavaScript Manager in WinCC OA and use the included example to begin development and deployment.
Setting up a JavaScript Module
- To create a new JavaScript module, first find the templates provided by WinCC OA in the folder javascript/templates/javascript in your WinCC OA installation directory.
- In your WinCC OA project, create a path called
javascript/<modulename> (where
<modulename>is the name you want to use for your module) and copy the contents of thetemplatesfolder from step 1 into<modulname>.Note:In case the copied files are read-only, it is necessary to enable write access using OS tools - In javascript/<modulname>/package.json, replace the
value for
"name"with the name of the module, which must be the same as the directory name by convention, e.g.:{ "name": "<modulename>", ... } - Open a command prompt in the copied javascript/<modulename> directory.
- Call the following command to install required modules
npm install - Add a JavaScript Manager with the path of
index.js in the copied directory as its only
parameter (relative to directory javascript, e.g.:
<modulename>/index.js). Set Start mode to
manual
Figure 1. Add a JavaScript Manager 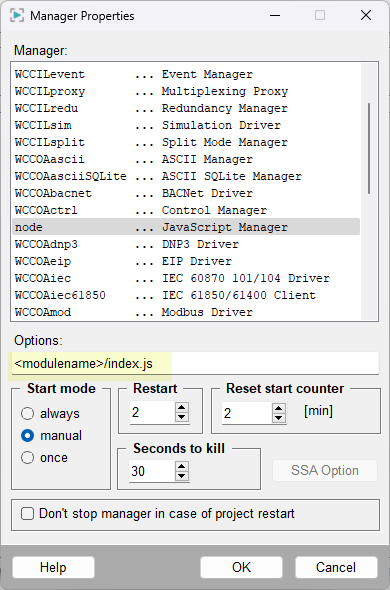
- Start the manager - it will terminate immediately
- Check that the message "
JavaScript Manager for WinCC OA working" is shown in the Log Viewer. - Start developing. Below you can find the JavaScript
module example:
'use strict'; // The command line for the Node.js® manager must contain the path to // this file relative to data/nodejs, e. g.: // // modulename/index.js // require WinCC OA interface const { WinccoaManager } = require('winccoa-manager'); const winccoa = new WinccoaManager(); // main function async function main() { const dpeName = 'ExampleDP_Arg1.'; const value = await winccoa.dpGet(dpeName); console.info('Node.js® manager for WinCC OA working'); console.info('Value of ' + dpeName + ' = ' + value); winccoa.exit(0); } // start the main function main();Note:JavaScript code must be called from inside a method or function to prevent unexpected or undefined behavior. - (optional, but recommended) Check and format your code with:
npm run lint
npm run format
Tip:
Although it is not necessary, nit might be helpful to tell the IDE the
location of the TypeScript type definitions to allow
auto-completion and displaying of method details. This can be done with IDE settings
or by the following command:
npm install --save-dev